Thursday, 6 September 2012

05.09.2012.
at 8am we went to e-shed and we got the computers out and we done some assessment catch up til 10am then after that we had first break til 10.20am then after that we went too workshop and started installing the wall gib in the lounge til 12pm then had lunch break til 1pm then went back to the the workshop carried on doing wall gibs in lounge til 3pm then had last break til 3.20pm then went back to workshop and carried on with the same til 4.20pm then had quick clean up then home time.

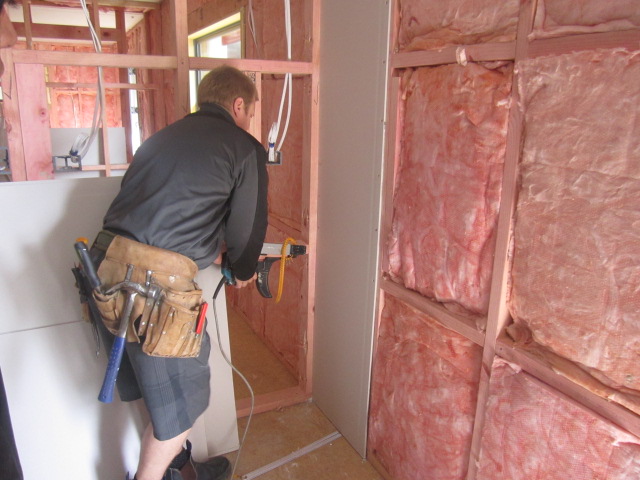
mark showing us how to do the nailing and measurements for the gib

mark showing us how to glue sheets of gib up

mark showing us the way to screw up the wall gib when going up vertical

first sheet installed 

wallrope gib installed

brendon installed wall rope gib

e-jay screwing up the wall gib

e-jay placing the gib in place

wall gib installed

darryn glueing

switch slot

two switches slots

switch slot

calculations for the light switches

04.09.2012.
at 8am we went to classroom up stairs with matt til 9am then after that we went to the workshop and me and  we done the ceiling gib- boarding and put them up til 10am then we had first break til 10.20am and went back to the e-shed and me and philip started on the end of the house top weatherboard til 12pm then had lunch break til 1pm then went back to workshop and carried on doing the weatherboard til 3pm then had last break til 3.20pm and then done clean up of the workshop then after that we done blogging til 4.30pm.

philip getting ready too cut the weatherboard to length


philip using the circular saw to cut weatherboard


the peice of the weather board that sits on window flashing


picture of the wallrope


facing board and scibers installed for an external corner

ceiling gib installed

lounge ceiling gib installed

battens on to hold glue 

Monday, 3 September 2012

03.09.2012.
at 9am we went too the classroom with mark and he went over the types of linings.

types of lining:
*MDF 20mm+ *fibre plaster *Gib-board *tiles *concrete *plywood *decrotive timber *stone wall *rumed earth *hardie glaze.

wet areas:
-aqualine
-aqua tough
-treated ply
-pawel
-villaboards
-hardie glaze

fire rated areas:
-gib- fire board
-rabboard
-villaboard- jarub hardies
-concrete

high impact areas:
-gib tough line
-gib- fire rock aqua - tough
-concrete

secure areas:
-gib fibre rock aqua tough
-concrete
-gib tough line

dry areas:
-gib board standard
-mdf
-plywood

high finished areas:
-gib ultra line

noise rooms:
-gib noise line

bracing- areas:
-brace line
-fibre line
-plywood
-hardie flex
-concrete
-tough line
-fibre rock aqua line - tough
-aqua line
-mdf

then at 10am we had first break til 10.20am and me philip and john started putting up the ceiling gib- board.

the first room ceiling gib put up

me philip and john cutting the next sheet

a square rule for a straight line cut

the glue put on

we put up the temperary sheet of gib  

justin helping us place the gib up

then after that we then had lunch break from 12pm til 1pm then we went back too the eshed then we then started helping brad and stevo put up the ceiling gib in the lounge room th 6m gib


ther measurements of the gib


the first sheet in the lounge been put up
brad put up ceiling battens
brad put in the joiner


then at 3pm we had last break til 3.20pm then we
went back too workshop and had a quick clean
up then started doing assessments and blogging til 
4.30pm then went home.

Wednesday, 29 August 2012

28.08.2012.
At 8am we went and finished the pink batts insulation then at 9am the insectors came in to check over the hoouse til bout 9.30am then after that me and tk started on the last window sciber.
til 10am we had first break til bout 10.30am then went back too workshop and me and tk went back too scriber.
til 12pm then had lunch break til 1pm and went to the eshed and done our assessments til 3pm then had last break til 3.20pm and me and tk done the last window flashing and  put tape on top.
extra notes about gib- boarding:
manufacturing of gib plasterboards:
Paper tape is 3 x stronger then fibre tape.
Gib board must be stored flat on the round.
substrate must be straight and dry
Joints around opening- not acceptable because could cause cracking.
Control joints are to avoid cracking
control joints are gaps between the two sheets
Back Blocking
Use the whole wall
150mm centres around to 7.5mm
100mm centres around 7.5-100mm
Tiled areas must be mechanically fastened. Not adhesive fixed.

STC- sound transmission class
68 is max for plaster board sound control.
the last window scriber done and installed..


the flashing on the window..

tk putting the tape on the flashing

Monday, 27 August 2012

the start of the pink batts insulation
 27.08 2012
today we done the pink batts insulation then did assessments in the afternoon.
two pink batts fitted in

picture of the celing pink batts

picture of the house

pink batts in the wall

wall pink batts

ceiling pink batts in


more wall  pink batts

Tuesday, 21 August 2012

20.08.2012.
at 9am we went too the classroom with mark and he was talking about the sound assessment.

Sound:
Sound Installation

sound waves- can you see them- yes you can

need to know the meanings of the following terms for this topic on sound control: and descriptions of each of the following:
-absorbtion
-acouustic
-amenity
-dicibel (DB)
-flanking
-gib sound seal
-impact insulation class (ITC)
-impact sound
-inter- tenancy
-noise
-nzbc
-reflection
-reverberation
-sound
-sound transmission class (STC)
-transmission

* how does sound travel - waves - deflection

then at 10am we then had 1st break til 10.20am then we went to the eshed and started on the finshing on the weatherboard top pieces til lunch break at 12pm then we went to lunch til 1pm then after that me and a few other students went on the roof and put the iron sheets down we bolted them and then at 3pm we had last break til 3.20pm then went back to the eshed and mark gave us our assessments for timber terminology and we sat the test til 4.30pm.

Monday, 13 August 2012

13.08.2012.
at 9am we went straight too the eshed and matt gave us an introduction of what he wanted done today was the scribbers so he showed the whole class how he wanted it done and we done them today and i also took some pictures of the roof then later on we done blogs and assessments


we were marking sciber

same as above

matt helping tk put on a sciber

sciber fixed on ready to be nailed and cut too length of the window

roof cladding done
roof cladding done


picture of roof fixed on